Showing posts with label Sourdough. Show all posts

October 28, 2014

Flat bread


Sometimes we just love stealing some dough from the batch we prepared for our weekly bread baking, turn it into a flat round, throw a few toppings on top of it – here: tomato sauce, artichokes, radicchio, cheese – and bake it on the hot stone. In this case we ended up with a whole-wheat-sourdough-crust pizza, and it was pretty awesome indeed! The bread turned out okay, too.

For the dough:

Starter
100 g water
100 g whole wheat flour
tsp of sourdough culture

Soaker
200 g water
100 g whole wheat flour
100 g cracked rye

Final dough
Starter and Soaker
360 g water
550 g flour (whole wheat and all purpose – 50/50)
18 g salt

December 21, 2012

Panettone


After trying my hand at baking Stollen earlier this season, I found myself hooked on baking traditional holiday breads, and 'Tis, the Season justifies pretty much anything...

Second Set: Panettone. The baking of this sweet Italian bread is extra thrilling and exciting, because the original recipe calls for a natural starter (or wild yeast). It is quite the process, producing the loaves, and it requires time; lots of it. You'll pretty much have to dedicate two whole days to this, but it's definitely worth it. As is usually the case with baking, you will have plenty of time to go about your daily business, and only once in a while you will need to take short breaks and come back to play with your beautiful dough.

The recipe I followed I got off of the Wild Yeast blog; and I am very grateful to Susan for sharing this superb formula and the detailed steps involved in the process. I made quite a few people happy by sharing some of my special bread. So, thank you, Susan! I found her post very helpful, and the pictures she took of her loaves and her crumb made me even more eager to attempt it myself. I had been trying for a while now to find a recipe that incorporated a sourdough starter, but found that probably as many as 90 percent of the recipes out there are using commercial yeast exclusively.

I would have loved my Panettones to have risen about an extra inch or so, and at first, when I took them out of the hot oven, I was almost a little bit disappointed with their oven spring. And to make matters worse, I managed to drop one while I was hanging them upside down to let them cool overnight. But the delicate and heavenly smell made it all better... Well, and all was forgiven and forgotten the next morning, when I cut into one of the loaves: The structure of the crumb was very beautiful, they smelled incredible and where melting in my mouth. The three loaves of Panettone I got out of this bake were probably the most rewarding thing I have ever baked so far. 

I wouldn't be able to describe the process better than Susan already did in her post, so I won't give you the formula, but rather will include the link to her page, as well as to her more recent (revised) Panettone notes. These were published just after I had baked my very first batch, last weekend, but since I am planning on baking a second batch this coming weekend (just in time for Christmas), I am very excited to improve my results by following Susan's notes.

Oh, and by the way, while I am writing this post, I'm sitting in my kitchen candying some fresh orange and lemon peel, that will go straight into my Panettone. Mmmmm... I'm already looking forward to next year's Christmas.

Submitted to YeastSpotting.

November 25, 2012

Vinschger Paarln


Vinschgauer or Vinschger Paarln are palm-sized, round flat breads that mostly come in pairs that can be torn apart. It's a specialty from South Tyrol, a bread mostly made with rye flour and spices, such as fennel seeds, caraway, and bird clover (birdsfoot fenugreek). I should add that bird clover is a bread spice typical of that region, and very hard to come by. If you can't get any, just leave it out; the fennel seeds and the fenugreek should add enough distinctive flavour to this bread.

Baking Vinschger Paarln was something I was planning for quite a while, since I really love their very particular taste. Finding a source for birdsfoot fenugreek was a little bit of a challenge, but in the end I was able to locate some in one of the many organic grocery shops, here in Wiesbaden, Germany. I am curious to see where I will find my source in Vancouver, once I'm back.

Anyway, today was the day, and I was eager to try out my adapted version from a formula I had found on the official info South Tyrolean website. Rather than using only commercial yeast, as the recipe suggested, I wanted to bake sourdough-based Vinschgauer. They turned out pretty nice, with a soft and moist crumb, lots of flavour, from all the spices, and due to the high amount of rye flour, they stayed fresh for a few days. That is also why the Vinschgerl are traditionally considered good companions on longer hikes. A perfect pairing for this kind of bread would be some aromatic mountain cheeses from the Alps, or plain butter.

For four pairs of Vinschgauer

200 gr ripe rye sourdough culture
250 gr rye flour
140 gr bread flour
450 gr water
10 gr yeast
10 gr salt
5 gr fennel seeds
3 gr caraway
2–3 gr bird clover/birdsfoot fenugreek

Grind the fennel seeds, caraway, and the birdsfoot fenugreek using a mortar and pestle, then mix all your ingredients, except for the salt, in a large mixing bowl. Let rest for about 30 minutes for the autolyse. Now add the salt and start kneading. You won't see much dough development, since there isn't a lot of gluten present in the rye flour. The dough will feel like a pasty mass. Let it rest for about 45 minutes at room temperature, then divide into eight equal pieces of dough (at about 130 grams each). Shape the pieces into rounds. Since the dough is super wet and sticky, flour your hands with plenty of rye flour and dust your work surface generously. Transfer the rounds as pairs on a baking tray with parchment paper, let them proof at room temperature for another 60 minutes or until you can see their floured skin showing a web of fine cracks. That is a sign that they are ready for baking. Bake them in a preheated oven at 450 Fahrenheit for about 30 minutes.

Submitted to Yeastspotting

August 2, 2012

German Rye


So long, Vancouver; I'm back in Germany for the next little while, visiting family and friends, working, and, of course, baking and taking pictures.

I took some of our two sourdough cultures in my luggage with me, and they seem to adapt quite well to their new home. Both cultures are pretty happy, they just need to be used a little bit more often. But, these days, I tend to get sidetracked with all sorts of different other things.

Florin is staying in Vancouver and he will continue to bake all his amazing breads as well.

However, for today's post, and awesome results, neither of us can claim any credit. The baker in today's story is Henning, my dad. Baking his own bread at home has always been a point of pride for him. His parents did all the bread baking for the entire family themselves, as well. Years back, when we moved into our new home, he built a little wood-burning oven for himself, just for private use. Ever since, he is baking all our bread in it, and he seems to have lots of fun doing it. Whenever he fires it up for baking, we have a little pizza party beforehand.

Even though my mum and dad have always baked all our bread themselves, I had to go all the way to Canada and meet Florin to really get into baking. Now I am very eager to try out my dad's oven myself, since I've never baked in a wood-fired oven before. I'll keep you posted about the results!

The recipe we are sharing with you today is for my dad's staple loaf, that he's been making since forever. It is a fairly dark rye sourdough, made of two thirds rye and one third wheat.

For two large and two medium loaves

Starter
(prepared 12 to 24 hours in advance and left at room temperature)

100 gr rye sourdough
1 kg medium coarse rye meal
1.2 kg water

Mix the rye meal and water until everything is well incorporated and the mixture has a pasty consistency.

Final dough

Starter
1 kg whole wheat flour
1 kg whole rye flour
1 kg water
50 gr salt

Add the water to the preferment, then add the whole wheat flour, the rye flour and the salt. Let bulk ferment at room temperature for about 8 hours, then shape the dough into loaves and let them rise in proofing baskets (for as much support as they can get). Let proof in final shape for about 4 hours. Bake the proofed loaves at 480 F (the temperature in the oven will slowly drop over time) for about one and a half hours.

Shared at YeastSpotting.

July 8, 2012

Dinner Rolls


In the olden days, when I still used to be a baker, we saved some dough from our baguette batches to turn it into dinner rolls. The results were always amazing. So much so, that my dinner rolls made it onto the 2011 Vancouver Magazine's "101 Things to Eat in Vancouver". Why the rolls, and not the baguettes themselves? It's still a mystery to me; but I'm not going to turn down some well-deserved praise no matter what shape or form it comes in. :)

You can try these rolls using the formula I gave in an earlier post about baguettes, or you can turn this into a strictly white flour affair, just like I did. I don't get to play with strictly white flour too often, so once in a while it can be quite fun. You will be surprised at how much flavour is "trapped" in good, old white flour.

Dinner rolls (for 10-12 rolls):

Levain
(prepared 12 hours in advance and left at room temperature)

80 gr water
80 gr all-purpose flour
1 tsp sourdough culture

Poolish
(prepared 12 hours in advance and left at room temperature)

80 gr water
80 gr all-purpose flour
1 gr yeast

Final Dough

250 gr water
450 gr all-purpose flour
12 gr salt
2 gr yeast
2 gr malt (optional)
Levain
Poolish

Follow the instructions for making baguettes. Bake on a tray at 450 F for about 20 minutes. Enjoy.

Submitted to YeastSpotting.

July 1, 2012

Pistachios and Cranberries


Yes, it's true: these days we are somehow very much into incorporating all sorts of things into our loaves. Even though, in general, we like to think of ourselves as having more of a traditional approach to baking, and despite being the big fans of all these great, established recipes, drawn from a long, deep-rooted baking history, every so often we're all about breaking the rules.

So, in other words, we are always open and eager to try out new things, and to play in our home kitchen with our ingredients and with our dough. And one thing is certain, cheese on top of a slice of fruity and/or nutty bread is (amongst many other things) one of our favourites.

This time around we chose some pistachios and cranberries, and incorporated them into a mostly white sourdough loaf. To make it not strictly 100% white, we made a soaker with some whole kamut flour, and added that to the dough. The loaves turned out to be quite dense (a little denser than we wanted them to be); but the flavour was all there, and we are still enjoying, as we speak, what is left over from the second loaf.

We will share this post also on Susan's weekly YeastSpotting page. 
 
Recipe

Starter 
(prepared 12 hours in advance and left at room temperature)
 
150 gr all-purpose flour
130 gr water
1 tsp ripe white sourdough culture

Soaker
(prepared 12 hours in advance and left at room temperature)
 
200 gr whole kamut flour
200 gr water

Final dough

700 gr all-purpose flour
320 gr water
Starter
Soaker
27 gr salt
150 gr pistachios
150 gr dried cranberries

Mix flour, starter, soaker and water, making sure to hydrate the flour well. Allow about 30 minutes for the autolyse, then add the salt and knead the dough until it is developed. After that, incorporate the pistachios and cranberries. Let the dough ferment at room temperature for about 3 hours and give it a stretch-and-fold after 30 minutes, repeat twice more at 30 minute intervals. After 3 hours of fermentation at room temperature, do a final stretch-and-fold; give it a round shape and put it in a lightly oiled bowl. Cover tightly and place in the refrigerator between 12 and 24 hours.

Take the dough out of the refrigerator, divide the bulk in half, degas the dough very gently and pre-shape as rounds. Allow them to rest for about 1 hour, then shape the rounds into bâtards or boules. Let the shaped loaves proof for about 45 minutes. Bake at 450 F for about 40 minutes, or until ready.

Oh, and Happy Canada Day!

June 26, 2012

Buntzen Lake and "Wurzelbrot"


The past weekend we finally got a chance to hike in an area we wanted to explore all spring and early summer long: The Buntzen Lake Reservoir. We started off on the Buntzen Lake Trail and continued on the Diez Vistas Trail, which offers amazing viewpoints that overlook Indian Arm and pretty much all of Vancouver. While the Buntzen Lake Trail leads you through the forest close to the water's edge and is more of a walk than a hike, the Diez Vistas is meant for more adventurous hikers and starts at the northern tip of Buntzen Lake. It was a nice day's outing, a perfect destination for a Sunday hike, and we finally got a chance this year to enjoy Vancouver's awesome surroundings.

Inspired by all the amazing trees and their incredibly beautiful networks of roots, we decided to bake a loaf originally known in German as "Wurzelbrot". It's a twisted, typical Swiss bread, that reminds one of roots (Wurzeln). Looking for a formula, we decided that we liked Bernd's the best, and gave it a shot. Unlike most other recipes for this kind of bread, the leavening agent is a sourdough culture as opposed to commercial yeast. We used our white culture, and added some whole wheat to the final dough, to give it a rustic touch. For flouring the work surface we used whole rye flour, which gave the crust a really nice rustic look and made it extra crunchy. 

Recipe for two loaves of "Wurzelbrot"

290 gr all-purpose flour (74%)
100 gr whole wheat flour (26%)
200 gr white sourdough culture at 100% hydration (51%)
250 gr water (64%)
9 gr salt (2.5%)

Mix to incorporate all the ingredients, except for the salt, and let it rest for 30 minutes for the autolyse. Now add the salt and knead to fully develop the dough. Bulk ferment for two hours, doing a stretch and fold every 30 minutes (four times). Then let it ferment for one more hour. Sprinkle some whole rye flour on a clean and dry work surface, divide the dough in half, and stretch gently lengthwise. Sprinkle more whole rye flour on top of them, then cover and let the pre-shaped loaves proof for about 45 minutes to an hour (Make sure there is enough rye flour, so that they won't stick to the work surface). After the final proof twist the loaves gently about three times, bake them right away for approximately 25 minutes on a hot stone in a pre-heated oven at 500 F. Steam the loaves right after you put them in the oven using your favourite steaming method.

We will submit this post to YeastSpotting.

June 19, 2012

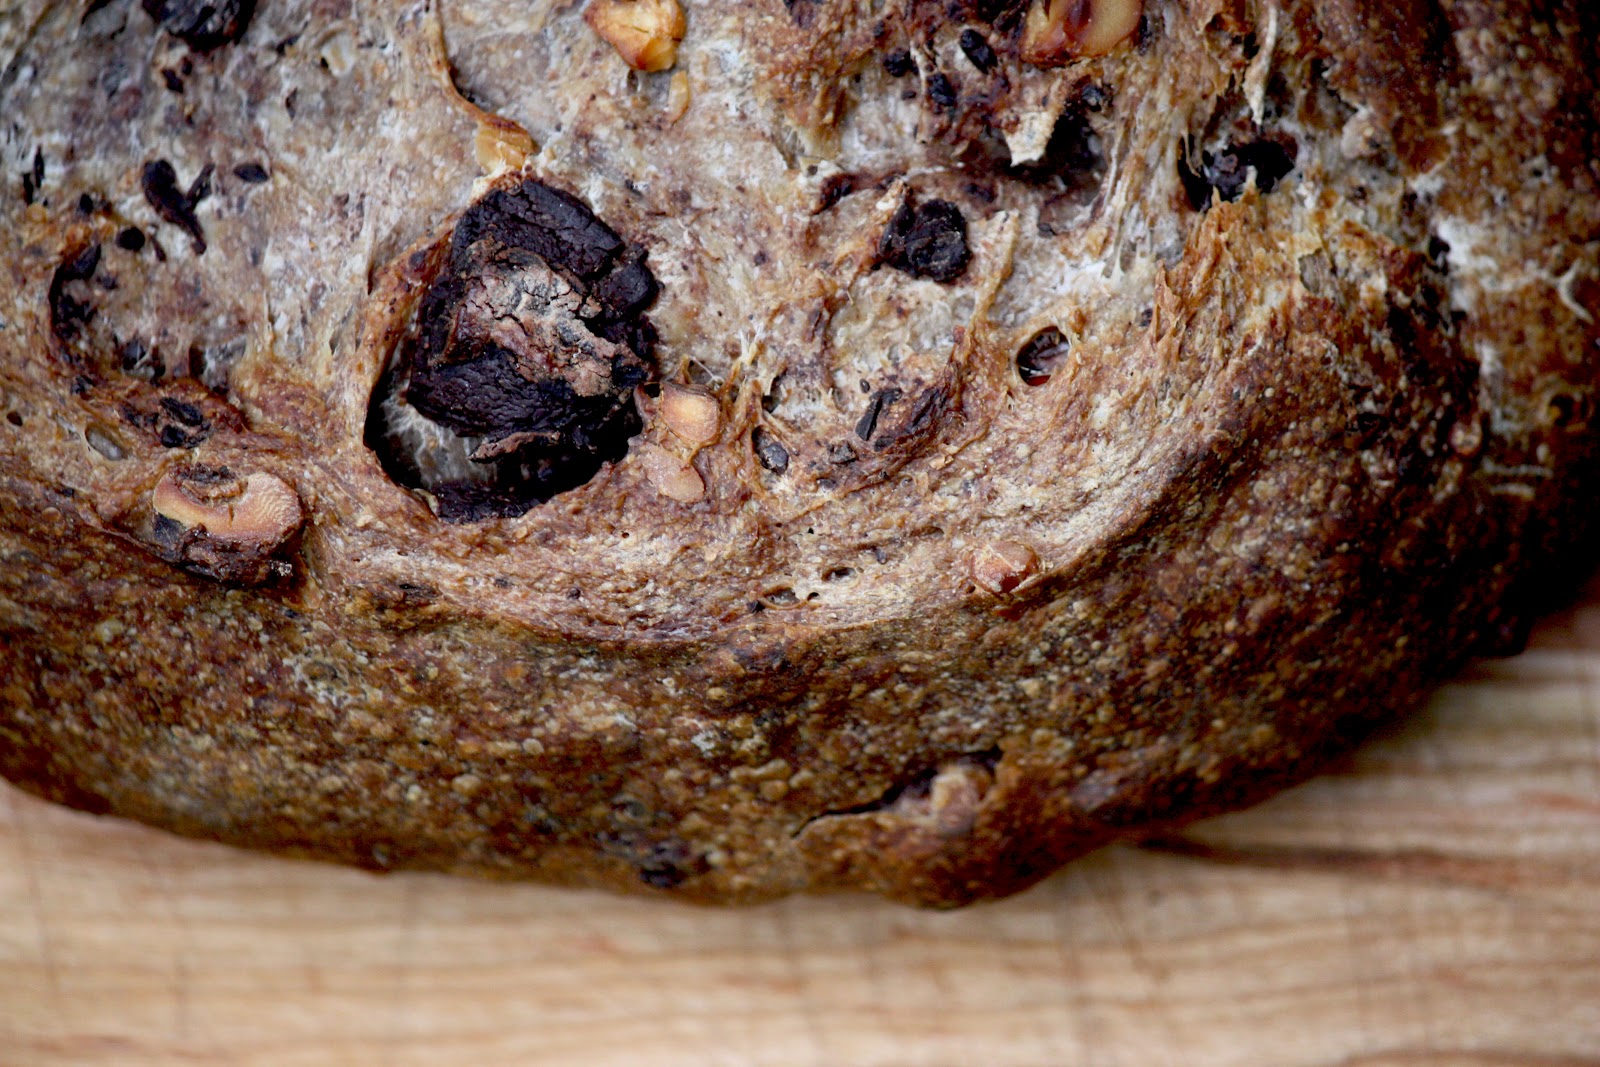
Chocolate and Walnut Sourdough

Mmmmm... Dark Chocolate (72%) and Walnuts incorporated in delicious sourdough dough. To be quite honest, both the idea and the formula are borrowed. We read about this yummy deliciousness on The Fresh Loaf (Thank you so much Ryan for your awesome post.). We read that post a while back and ever since it stayed with us and we were looking forward to the day we get to try it out. That day was yesterday. To be more accurate, the preparations started already three days ago, since the dough had been retarded in bulk in our fridge for more than 21 hours!

There's one favour we ask of you: use high quality chocolate. It makes all the difference.

For two small loaves

450 gr all-purpose flour
25 gr whole wheat flour
25 gr rye flour
150 gr sourdough starter at 100 % hydration (we used our rye culture)
360 gr water
12 gr salt
125 gr coarsely chopped walnuts
100 gr coarsely chopped dark chocolate

Mix the flour, the starter and water, making sure to hydrate the flour well. Allow about 30 minutes for the autolyse, then add the salt and knead the dough until it is developed. After that, incorporate the chopped walnuts and chocolate. Let the dough ferment at room temperature for about 3 hours and give it a stretch-and-fold after 30 minutes, repeat twice more at 30 minute intervals. After 3 hours of fermentation at room temperature, do a final stretch-and-fold; give it a round shape and put it in a lightly oiled bowl. Cover tightly and place in the refrigerator between 12 and 24 hours.

Take the dough out of the refrigerator, divide the bulk in half, degas the dough very gently and pre-shape as rounds. Allow them to rest for about 1 hour, then shape the rounds into bâtards or boules. Let the shaped loaves proof for about 45 minutes. Bake at 450 F for about 40 minutes, or until ready.

This post is also shared at YeastSpotting.

June 12, 2012

La Baguette


There is one type of loaf that every serious home baker has to bake at least once in his own home kitchen, and that is the baguette. For one reason or another, baguettes, these long, elegant, yummy bread sticks, are very intimidating. Every single home baker I have talked to over the years keeps postponing the day when they will make the big attempt.

I felt a little bit intimidated myself this past Sunday, despite the fact that I have baked tons of these babies in my deck oven at the bakery. I can think of a number of reasons why baking baguette in a home oven is less than ideal:

  1. Obviously, your baguette will have to be a lot shorter than the traditional 26 inch of a usual French baguette. I ended up doing mine at only 16 inch long. 
  2. A shorter baguette means fewer slashes. The French slash their baguettes as many as ten times. That's crazy! And beautiful at the same time. At the bakery, we always slashed ours five times only, and on these short babies, I managed only four slashes. 
  3. Baking in your home oven will mean that you only have a limited amount of dough in the oven, and that, combined with the lack of proper steaming, means you'll have to try really hard to achieve that perfect crust.
But hey, this is not supposed to be a post about why you shouldn't bake baguettes at home. The bottom line is, I had tons of fun baking the baguettes and the results where quite alright. Just look at that super-awesome open crumb! And no, this is not a baguette I bought at my favourite bakery and took home for a photo-shoot.

Don't postpone any further and give it a shot. You will get a lot of satisfaction out of this. After all, anyone can bake great baguettes in a commercial kitchen, using a professional deck oven. So I dare you to try this at home!

And, by the way, I am happy to share my own baguette recipe with everybody out there. I've been told numerous times that it's a damn good one. Enjoy.

The "Secret" Formula

Levain
(prepared 12 hours in advance and left at room temperature)

80 gr water
60 gr all-purpose flour
20 gr rye flour
1 tsp sourdough culture

Poolish
(prepared 12 hours in advance and left at room temperature)

80 gr water
80 gr all-purpose flour
1 gr yeast


Final Dough

248 gr water
400 gr all-purpose flour
20 gr whole wheat flour
12 gr salt
1 gr yeast
1 gr malt
Levain
Poolish

Mix all your ingredients except for the salt and do a 20 minute autolyse. Add the salt and knead to fully develop the dough. Bulk ferment for one hour, then stretch and fold and ferment for another hour. Divide (I scaled mine at 200 gr), pre-shape into logs, cover and let sit for about 30 minutes. Shape into baguettes (there must be some awesome YouTube video out there that shows you how it's done) and proof for 45 minutes to an hour. Bake at 475 F for 20 minutes. Voilà.

We will share this post on YeastSpotting as well.

June 7, 2012

Sprouting Kamut

Finally we have another bread post for you! We got a bit carried away baking croissants for all of the past week.

The result of our latest baking adventure is a batch of sprouted kamut loaves. We used a 50/50 blend of kamut and all-purpose wheat flour, and threw some sprouted kamut grains into the mix just for the hell of it. We like the outcome very much; it has a mild, delicate flavour; the crumb is quite dense but moist and soft at the same time. It definitely makes a fabulous sandwich loaf.

Starter
(prepared 12 hours in advance and left at room temperature)

125 gr all-purpose flour
145 gr water
20 gr sourdough culture

Soaker
(prepared 12 hours in advance and left at room temperature)

200 gr kamut flour
200 gr water

Sprouted grain
(sprouted for two days)
150 gr kamut kernels

Final Dough

400 gr kamut flour
475 gr all-purpose flour
325 gr water
Starter
Soaker
Sprouted grain
6 gr yeast
30 gr salt

Mix water, kamut and all-purpose flour, starter, soaker, the sprouted grain, and the yeast to incorporation. Allow 30 minutes for the autolyse, then add the salt and start kneading the dough on a smooth and clean surface until fully developed. Let it rest for about one hour and a half to two hours, then give it a stretch and fold. Let rest for another hour; stretch and fold again. After one more hour of resting the dough should be ready for shaping. Divide the bulk in two equal pieces, shape the loaves and let them proof for one more hour. Bake at 450 F for about 45 minutes, or until ready.

May 18, 2012

Crack That Wheat


We can't resist a good, honest, white sourdough. That much is sure. But we also like to give it a little bit of colour, either by using some whole grain flour, or, as in this case, with some cracked grain that we soak overnight.

The white flour helps create an amazing structure with beautiful, big holes... The hard part is always to wait with cutting into the loaf till after it has cooled down and set properly. Then one can see the true results, and whether one has handled the dough gently enough, or not. This loaf happened to be quite a beauty; we are very pleased with the way it turned out. It will probably make for a great travelling companion for our upcoming trip to Nelson this weekend. We are excited!

The Formula

240 gr white sourdough culture
500 gr all-purpose flour
50 gr whole rye flour
140 gr cracked wheat (soaked overnight in an equal amount of water)
300 gr water
16 gr salt

To prepare your dough and bake your loaf, follow the steps outlined in our earlier post about The Simple Life.

May 16, 2012

All That Grain


Our latest creation happens to be a multigrain loaf loaded with lots of different grains and seeds. You can try different combinations based on your own preference. This particular one consists of oat, rye, and barley flakes, millet, flax, sesame, and sunflower seeds. We used our rye sourdough culture to leaven the dough, and it contains, besides the pre-soaked multigrain mash, whole wheat and white flour in equal amounts. The texture turned out very dense and moist. We'll probably never find out how long it would stay that way, because it will be gone pretty fast. Who are we kidding, most of it is already gone as we write these lines! We had it for breakfast with apricot jam and it was yummy.

Here's how it's done:

The multigrain mash

150 gr of the grains and seeds mixture of your choice
150 gr water

Soak the mixed grains for approximately 4 hours (or over night) in 200 grams of water heated to about 165 F.

The final dough

150 gr ripe rye sourdough culture 
225 gr all-purpose flour
225 gr whole wheat flour

275 gr water

300 gr multigrain mash
15 gr salt

Mix the flour, water, multigrain mash, and sourdough culture. Let sit for about half an hour for the autolyse. Then, incorporate the salt and start kneading until your dough is fully developed. Put the dough in a bowl, cover it and let it rest for one hour. Continue by doing a stretch and fold in the bowl every hour. Let it ferment between 4 and 6 hours, then shape your loaf and let it proof for about one more hour. Bake for about 60 minutes at 450 F.

May 11, 2012

The Simple Life


This is a really simple and basic sourdough loaf, partly whole wheat and partly white all-purpose flour. By letting it ferment for about 8 hours, we gave it plenty of time to develop its flavour. The result is superb: high complexity of flavours combined with an amazing structure and a pretty nice crust. The simple life is so enjoyable.

Speaking of crust, lately we have started to bake our loaves covered with a metal bowl for the first half hour of the baking time. We find that it works really nicely. In fact, it works a lot better than spraying water inside the hot oven. The bowl covering the loaf while it bakes keeps a lot of the moister inside and it helps with the development of a great crust.

The Secret:

240 gr ripe white sourdough culture (42 %)
300 gr all-purpose flour (54 %)
260 gr whole wheat flour (46 %)
360 gr water (64 %)
14 gr salt (2.5 %)

Mix your flour, water and the white sourdough culture; be sure to hydrate all of the flour but don't do any kneading yet. Let it sit for 30 minutes, then add the salt. Now the actual kneading can begin. Since the hydration is fairly high, we started out by kneading the dough in the bowl for about 5 minutes. Let it rest for 10 minutes, then transfer the dough on a flat surface and knead it again for approximately 5 minutes. Give it once more time to relax, then do the final kneading for 5 more minutes.

Once your dough is fully developed, put it in a lightly oiled bowl, cover it and let it bulk ferment. After 2 hours give it a gentle stretch and fold in the bowl. Repeat this sequence twice, so that your dough gets at least 6 hours of fermenting and two stretch-and-folds. Shape the loaf and let it proof for one hour. Bake the proofed loaf for about 45 minutes in the preheated oven at 450 F.

May 4, 2012

Wild Yeast

May we introduce? These are our little babies, two quite different individuals; both are exceptional and one of a kind. And both are very much alive! To keep them active and happy at all times, we use them in our baking on a regular basis. The two sourdough cultures go back to Florin's time as a baker. The rye culture he started himself from scratch, while he got the white flour culture from a friend. 

If baking with sourdough is something that interests you, but you don't have a source for the culture, just start your own. It's easy and fun. All you need is water, flour and a little bit of patience.

How it all works

In a sourdough culture there are two kinds of micro-organisms: the flavour-producing bacteria (lactobacilli) and some sort of leavening agent (in this case, wild yeasts). A sourdough culture (or starter), used in bread baking, is a symbiosis of these two types of micro-organisms. 

While the particular species may vary from culture to culture, the basic mechanism is always the same: The lactobacillus is what gives sourdough bread its characteristic flavour. It makes the culture acidic, and is responsible for keeping the culture healthy and "clean", while fighting other compeating micro-organisms and pathogens. The yeast is what makes the dough rise. In the process of fermentation, the carbon dioxide that is produced, will create the air pockets that give bread its characteristic structure.

Once you started a sourdough culture you need to feed it on a regular basis. If you decide to keep your culture at room temperature you will have to feed it quite frequently, approximately every 12–24 hours (depending on the ambient temperature and on how active your culture is). If  that sounds too intense for you, you might consider refrigerating your culture right after feeding it. You can keep it in the fridge for about week. To use it in baking, remember to take it out of the fridge the day before you actually want to use it. Let it come to room temperature, then replenish it once and give it time to ferment. Now it should be ready to go. 

Feeding your culture involves removing parts of it, to get rid of its waste products (so that the environment doesn't become hostile to your pet microbes), then replenishing the remainder with fresh water and the type of flour of your choice. Make sure that all of the flour is hydrated. 

Day 1

To get started, take a clean container and mix about 200 grams of flour (wheat or rye) with 200 grams of water. Close the container and have it sitting at room temperature. 

Day 2

Feed your mixture after 24 hours by discarding half of it and adding again 200 grams of flour and 200 grams of water. Make sure that everything is mixed well and all of the flour is hydrated.  

Day 3

At this point there will probably be some signs of fermentation, your water-flour mixture might start to show bubbles and might have risen a little bit. Keep feeding your starter following the same schedule as before. 

Day 4

Today you should see a lot of rising. The starter might have doubled in size, or even more. If that is not the case let it sit for another 12 to 24 hours. Feed it the same way as before. It is ready, when it expands in only a few hours after feeding. It might also take another day or two, to get to that point.  If you decide to make a stiffer starter, add some extra flour.

There you go, you have helped your own sourdough culture come alive!

May 1, 2012

Currants and Sunflower Seeds


Since the formula we used for the walnut sourdough was so successful, we promptly used it in our next loaf. This time making a slightly larger batch, and incorporating currants and sunflower seeds. So good. 

The Formula
makes one large loaf

240 gr ripe rye sourdough culture (48 %)
370 gr all-purpose flour (74 %)
50 gr whole rye flour (10 %)
80 gr whole wheat flour (16 %)
360 gr water (72 %)
14 gr salt (2.8 %)

100 gr currants (20 %)
100 gr sunflower seeds (20 %)


Incorporate all of your flour together with all of the water and the rye sourdough culture. Make sure the flour is properly hydrated, but do not knead or develop your dough yet. Let it sit for 30 minutes for the autolyse, then add the salt and knead the dough for about 10 minutes. Once your dough is fully developed, gently incorporate the currants and the sunflower seeds. Let the dough ferment for about 2 hours, then give it a gentle stretch and fold and let it rest for another hour or two. Now the dough is ready for shaping. Let it proof for one hour and bake the proofed loaf for about 50 minutes in the preheated oven at 450 F.

April 26, 2012

Walnut Sourdough


It's been a while since our last post, so here we go, baking a little walnut sourdough loaf. Walnut breads have been one of our favourites since forever: We love the nutty taste combined with creamy cheeses or just with butter. It is to die for!

Creating this blog, naturally took us to many, many food and bread blogs on the internet, but one in particular has caught our attention: The Fresh Loaf by Ryan Sandler. The formula we are using today is found on that site, and it was submitted by Hans Joakim. We have slightly adjusted the formula, just because we couldn't resist playing God. Try it out; it is awesome.

The Recipe
Makes one loaf of Walnut Sourdough

Rye Sourdough

100 gr whole rye flour
100 gr water
40 gr ripe rye sourdough culture

Mix the ingredients together and let ferment approximately 12-15 hours at room temperature.

Final Dough

310 gr all-purpose flour
39 gr whole rye flour
64 gr whole wheat flour
294 gr water
11 gr salt
100 gr walnuts, roughly chopped
240 gr rye sourdough

Incorporate the all-purpose flour, whole rye flour, whole wheat flour, water and the rye sourdough until all of the flour is hydrated. Let it sit for 30 minutes to do the autolyse. Add the salt and knead the dough for about 10 minutes. Now add the walnuts and gently incorporate them. Let the dough rise for about 2 hours, then give it a gentle stretch and fold and let it rest for another hour. Now the dough is ready for shaping. Let the shaped loaf rise for 1 hour. Bake the proofed loaf for about 45 minutes in the preheated oven at 450 F. Enjoy.