Showing posts with label Formulas and Recipes. Show all posts

October 28, 2014

Flat bread


Sometimes we just love stealing some dough from the batch we prepared for our weekly bread baking, turn it into a flat round, throw a few toppings on top of it – here: tomato sauce, artichokes, radicchio, cheese – and bake it on the hot stone. In this case we ended up with a whole-wheat-sourdough-crust pizza, and it was pretty awesome indeed! The bread turned out okay, too.

For the dough:

Starter
100 g water
100 g whole wheat flour
tsp of sourdough culture

Soaker
200 g water
100 g whole wheat flour
100 g cracked rye

Final dough
Starter and Soaker
360 g water
550 g flour (whole wheat and all purpose – 50/50)
18 g salt

December 21, 2012

Panettone


After trying my hand at baking Stollen earlier this season, I found myself hooked on baking traditional holiday breads, and 'Tis, the Season justifies pretty much anything...

Second Set: Panettone. The baking of this sweet Italian bread is extra thrilling and exciting, because the original recipe calls for a natural starter (or wild yeast). It is quite the process, producing the loaves, and it requires time; lots of it. You'll pretty much have to dedicate two whole days to this, but it's definitely worth it. As is usually the case with baking, you will have plenty of time to go about your daily business, and only once in a while you will need to take short breaks and come back to play with your beautiful dough.

The recipe I followed I got off of the Wild Yeast blog; and I am very grateful to Susan for sharing this superb formula and the detailed steps involved in the process. I made quite a few people happy by sharing some of my special bread. So, thank you, Susan! I found her post very helpful, and the pictures she took of her loaves and her crumb made me even more eager to attempt it myself. I had been trying for a while now to find a recipe that incorporated a sourdough starter, but found that probably as many as 90 percent of the recipes out there are using commercial yeast exclusively.

I would have loved my Panettones to have risen about an extra inch or so, and at first, when I took them out of the hot oven, I was almost a little bit disappointed with their oven spring. And to make matters worse, I managed to drop one while I was hanging them upside down to let them cool overnight. But the delicate and heavenly smell made it all better... Well, and all was forgiven and forgotten the next morning, when I cut into one of the loaves: The structure of the crumb was very beautiful, they smelled incredible and where melting in my mouth. The three loaves of Panettone I got out of this bake were probably the most rewarding thing I have ever baked so far. 

I wouldn't be able to describe the process better than Susan already did in her post, so I won't give you the formula, but rather will include the link to her page, as well as to her more recent (revised) Panettone notes. These were published just after I had baked my very first batch, last weekend, but since I am planning on baking a second batch this coming weekend (just in time for Christmas), I am very excited to improve my results by following Susan's notes.

Oh, and by the way, while I am writing this post, I'm sitting in my kitchen candying some fresh orange and lemon peel, that will go straight into my Panettone. Mmmmm... I'm already looking forward to next year's Christmas.

Submitted to YeastSpotting.

December 2, 2012

In Preparation for Christmas


We just had the first serious snowfall of the season; it came down last night. Add that to all the Christmas preparations I was making during the past days, and it really felt like the first day of Advent today.

On my day off, Friday, I finally managed to bake the stollen I was so looking forward to for the past few weeks. The marzipan having been already made beforehand, was sitting in the fridge, just waiting to be used. I had found a recipe for candied orange peel on a dear friends amazing blog (in German only). Just knowing that I would have to work with the marzipan and the candied orange peel made baking the Christmassy loaf so much more exciting!

Stollen is a traditional German fruit cake or holiday bread made with lots and lots of dried and candied fruit, almonds and spices, often containing marzipan, and covered with a thick layer of icing sugar, reminding one of a snow covered landscape. It is a bread only eaten during the Christmas season, but baked a few weeks ahead of time, so that it can properly age, stored in a cool, dark place. This is probably one of the main aspects of the stollen tradition. Strictly speaking, I might be already a little late baking it, but, to my mind, two to three weeks are still plenty of time for it to age and to develop all its unique flavours.

In my baking I am a big fan of long and slow fermentation. That is why I decided to use a poolish when baking my stollen (prepared 12 to 16 hours ahead), instead of the more traditional yeast sponge, which only gets to ferment for a couple of hours. For the rest of the recipe I did some research, and ended up developing my own, combining information from a few different sources. The dough turned out super nice, pretty soft and sticky with all that butter and marzipan in it. When I was ready to shape it, I managed to achieve a beautiful stollen loaf, but I was pretty sure that it wouldn't hold its shape during the bake. And sadly, I was right. In my opinion it turned out somewhat too flat; but anyway, it's still very, very beautiful!

While the dough was proofing and later, as the loaf was baking, I had enough time on my hands to clean up the mess in my kitchen, make an Advent wreath from some fir branches I had bought at the market, and to fold a few paper snow flakes. And today, after taking a two-day break from the whole stollen business, I had tons of fun covering my stollen with plenty of icing sugar and giving it a similar look to the lanscape outside my window after a snowy winter's night.

Usually you are not allowed to cut into the stollen as early as I did, since it really needs to be allowed to age for a few weeks, as I already mentioned above. Well, I made an exception because I am sending half of it overseas, to Florin, one of the biggest stollen fans in Canada!

For one large Christmas Stollen

Poolish (allow to ferment at room temperature for about 12 to 16 hours )

125 gr bread flour
125 gr water
1 gr yeast

Final dough

275 gr bread flour
125 gr milk
5 gr yeast
1 tbs honey
poolish
150 gr marzipan paste, grated
200 gr butter
1 organic lemon
1/2 vanilla bean
5 gr salt

Nuts and fruit mixture 

500 gr raisins/currants mixture, soaked over night in either rum or apple juice
55 gr almond slices, soaked for about 10 min in hot water
110 gr candied lemon and orange peel

Option for the filling

extra 100 gr marzipan paste

For the finish

250 gr butter, melted
refined sugar
icing sugar

Put all your flour in a large mixing bowl and form a little well in the middle. Add the yeast into the well, then add the lukewarm milk and the honey. Stir in some of the flour, put the mixing bowl aside, cover with a tea towel and let it sit for about half an hour. Now add the poolish, the grated marzipan paste, 200 gr from the soft butter, the grated zest from one organic lemon and the vanilla. Mix all your ingredients until well incorporated, then do a 30 minutes autolyse. Now add the salt and do the kneading until the dough is properly developed. Don't despair, it will be pretty wet and sticky, and all the fat will make it even harder on you. After the dough is developed, gently incorporate the nuts and fruit mixture (carefully drained to avoid adding too much extra liquid to the dough). If you don't like working with extra wet dough, go ahead and add a little extra flour. Give the dough about two hours to proof until it almost doubles in size. Shape the stollen on a lightly floured work surface and in the process add another 100 grams of marzipan paste shaped into a strip, down the middle of your stollen loaf. Preheat the oven to 390 F, bake at that temperature for the first 15  minutes, then drop it to 350 F and bake it for another hour. To avoid it turning too dark, cover with aluminium foil for the final 30 minutes.

After taking the stollen out of the hot oven, brush it immediately with about 250 grams of melted butter, then toss with plenty of refined sugar. Let the loaf cool down over night properly before dusting it with a thick layer of icing sugar. Wrap in aluminum foil and store it in a cool, dark place for at least two weeks before cutting into it.

For YeastSpotting!

November 25, 2012

Vinschger Paarln


Vinschgauer or Vinschger Paarln are palm-sized, round flat breads that mostly come in pairs that can be torn apart. It's a specialty from South Tyrol, a bread mostly made with rye flour and spices, such as fennel seeds, caraway, and bird clover (birdsfoot fenugreek). I should add that bird clover is a bread spice typical of that region, and very hard to come by. If you can't get any, just leave it out; the fennel seeds and the fenugreek should add enough distinctive flavour to this bread.

Baking Vinschger Paarln was something I was planning for quite a while, since I really love their very particular taste. Finding a source for birdsfoot fenugreek was a little bit of a challenge, but in the end I was able to locate some in one of the many organic grocery shops, here in Wiesbaden, Germany. I am curious to see where I will find my source in Vancouver, once I'm back.

Anyway, today was the day, and I was eager to try out my adapted version from a formula I had found on the official info South Tyrolean website. Rather than using only commercial yeast, as the recipe suggested, I wanted to bake sourdough-based Vinschgauer. They turned out pretty nice, with a soft and moist crumb, lots of flavour, from all the spices, and due to the high amount of rye flour, they stayed fresh for a few days. That is also why the Vinschgerl are traditionally considered good companions on longer hikes. A perfect pairing for this kind of bread would be some aromatic mountain cheeses from the Alps, or plain butter.

For four pairs of Vinschgauer

200 gr ripe rye sourdough culture
250 gr rye flour
140 gr bread flour
450 gr water
10 gr yeast
10 gr salt
5 gr fennel seeds
3 gr caraway
2–3 gr bird clover/birdsfoot fenugreek

Grind the fennel seeds, caraway, and the birdsfoot fenugreek using a mortar and pestle, then mix all your ingredients, except for the salt, in a large mixing bowl. Let rest for about 30 minutes for the autolyse. Now add the salt and start kneading. You won't see much dough development, since there isn't a lot of gluten present in the rye flour. The dough will feel like a pasty mass. Let it rest for about 45 minutes at room temperature, then divide into eight equal pieces of dough (at about 130 grams each). Shape the pieces into rounds. Since the dough is super wet and sticky, flour your hands with plenty of rye flour and dust your work surface generously. Transfer the rounds as pairs on a baking tray with parchment paper, let them proof at room temperature for another 60 minutes or until you can see their floured skin showing a web of fine cracks. That is a sign that they are ready for baking. Bake them in a preheated oven at 450 Fahrenheit for about 30 minutes.

Submitted to Yeastspotting. 

October 5, 2012

Focaccia


I am still without a sourdough culture, but I'm back at the baking business anyway. For today, I decided to try my hand at a focaccia (I had meant to share a paticular recipe here with you since forever). Making focaccia is what got me into baking in the first place. Florin developed a recipe for me to practise my baking skills, when he still owned his bakery in Vancouver, and I used to work for him (Not as a baker, by the way!). When my first couple of loaves came out of the oven, it was just before closing time. Bending all rules, we didn't wait for them to cool down, but cut into these beautiful, golden, flat rounds right away. The aroma in the bakery was heavenly. We shared the yummy deliciousness with some late customers who had dropped by the shop, and it was all gone in no time. Ever since that evening, the focaccia became famous, and I was hooked on baking.

What I love about focaccia is that it brings the whole Mediterranean atmosphere (and Italy itself) into your kitchen and your heart; and on top of that, it never gets tiring, since it can be so versatile: You can either add all sorts of yummy things to the dough or decide on a topping. Olives, sun dried or fresh tomatoes, herbs, onions, or simply sea salt flakes always make for great taste. Also it is the perfect sandwich loaf, either fresh or grilled. 

For today’s bake I didn't have the original recipe handy, so I was trying really hard to reproduce it from memory. In the end, it turned out that my memory isn't the greatest (Florin gave me the formula in the meantime and it's definitely different from what I did), but the focaccia came out fairly nice anyway. I will bake and share the original recipe at a later date with you, but for today this is what we have:


Poolish

(prepared 12 hours in advance and left at room temperature)

300 gr all purpose flour
300 gr water
2 gr yeast

Final dough

600 gr all purpose flour
330 gr water
30 gr olive oil
5 gr yeast
poolish
18 gr salt

Mix all your ingredients with the exception of the salt and do a 20 minute autolyse. Add the salt and knead to fully develop the dough. Bulk ferment for one hour, then stretch and fold the dough and give it another hour to ferment. Now preheat the oven to 470 F. Oil a baking tray or pan and transfer the dough out of the bowl. Stretch the dough very gently, using all ten fingertips to form the focaccia, add your toppings of choice. Cover with plastic and let proof for another 20 to 30 minutes, then bake for 25 minutes or till done.

Submitting this to Yeastspotting.

September 27, 2012

Seedy Crackers


There are times in our busy lives when there isn't any time to pursue all the little things we are so passionate about; when everything is constantly changing around us; when we have to adjust and focus on all the new happenings around us. But then, eventually, we find that new rhythm and we manage to get back to all those precious things we had to go without for a little while.

Well, here's hoping that I will manage to get back into a rhythm. These days, my life tends to be very distracting; and that's great, but really truly: I miss baking a lot, and taking pictures of my (or Florin's) loaves, and sharing all the fun here, on this blog. So, here's a promise to you guys, as well as to myself: I shall make time for all of that again, very soon.

Finally, I decided that today is the day I when I would get back to baking, albeit without having any sourdough culture at hand. I managed to let my starters (smuggled across borders, from Canada to Germany) die. Luckily, my dad did dry some of these cultures and saved them for his own use. So, I hope to bring them back to life someday. However, I felt it was the perfect day to bake some crispy crackers, with a ton of seeds in them. And this is how it's done:
 
Basic Ingredients

160 gr bread flour (38%)
200 gr durum semolina flour (47.6%)
60 gr quinoa flour (14%)
12 gr salt (2.8%)
150 gr water (36%)
40 gr olive oil (9.5%)

The Seeds (use any seeds or nuts of your choice)

50 gr flax seeds (11.9%)
40 gr sesame seeds (9.5%)
40 gr poppy seeds (9.5%)

Soak the flax seeds in the 150 grams of water overnight, or at least a few hours before you plan to bake the crackers. Toast the sesame seeds and then combine all the dry ingredients. Now add the soaked flax seeds and the olive oil. Kneading the dough should feel pretty tough, since there is not a lot of liquid involved. It is important to work the dough until it is pliable and smooth, rather than crumbly and dry. If you find that you need to add some extra water, do so, but keep in mind that you are aiming for a very stiff dough. Once you are done, cover the dough with saran wrap and let it rest for at least 30 minutes at room temperature.

Roll out thinly, using a rolling pin. The thinner you roll out the dough, the crisper your crackers will be. Cut into any shape, brush with water and sprinkle with seeds. Bake the crackers at 400 F for about 10 minutes. They should start to brown when they are ready. Enjoy with any of your favourite dips!

Submitted to Yeastspotting.

September 8, 2012

Crazy about pizza


Perfect crust. Tomatoes and bocconcini. Fresh herbs. In other words: Pizza. Yum!

As lovers of bread it is only natural that we are also continuously trying to find the perfect pizza pie. Certainly the main criteria here should be the crust, even though we have some pretty high expectations of the toppings as well. Apparently it is not that easy to find the pizza we are all dreaming of, and sometimes the journey can be a little bit frustrating and disappointing.

This time around, in searching for the perfect pizza we found that it is a little bit easier to be successful in the Rhine-Main area of Germany, than it is in Vancouver. At least we were getting closer.

Of course, two passionate bakers wouldn't be too passionate, if they could resist the urge of playing with a formula for pizza dough themselves. And play we did. Since Florin came over to Germany to visit for a little while, and make friends with my dad and my dad's wood-burning oven, we took advantage of the opportunity and baked some pretty decent pizza of our own. We are still in the process of developing our favourite, favourite pizza crust, but in the meantime we are fairly happy with our results.

For the crust, the total formula is:

1136 gr flour (100%)
772 gr water (68%)
15.5 gr yeast (1.4%)
20 gr salt (1.8%)
57 gr olive oil  (5%)

We used 00 flour in this case, but at home we usually go with all-purpose.

Prepare a biga 12 hours in advance and let it sit at room temperature. The formula for the biga is:

229 gr flour (100%)
137 gr water (60%)
0.5 gr yeast (0.2%)

To put it all together, use the following final dough formula:

907 gr flour (100%)
635 gr water (70%)
20 gr salt (2.2%)
15 gr yeast (1.6%)
57 gr olive oil (6.3%)
366 gr biga (40%)

Mix all your ingredients with the exception of the salt and do a 20 minute autolyse. Add the salt and knead to fully develop the dough. Bulk ferment for one hour, then stretch and fold and ferment for another hour. Divide the dough into 200 gr pieces and shape into rounds. Refrigerate the pre-shaped dough covered on a baking tray for at least 6 and up to 24 hours. Take the pizza dough out of the refrigerator an hour or two before you plan to bake the pizza, to let it come to room temperature. Now preheat your oven on the highest setting, so that the baking stone gets enough time to really heat up. (The wood-burning oven was really, really hot, and the pizza had to cook only for a couple of minutes.) Stretch the dough to form the crust, add your toppings of choice and bake till done. Buon appetito.

What is your favourite pizza story? Who makes the best pie in your neck of the woods? Do you know of any good pizza blogs? Let us know.

Submitting this to Yeastspotting. 

August 2, 2012

German Rye


So long, Vancouver; I'm back in Germany for the next little while, visiting family and friends, working, and, of course, baking and taking pictures.

I took some of our two sourdough cultures in my luggage with me, and they seem to adapt quite well to their new home. Both cultures are pretty happy, they just need to be used a little bit more often. But, these days, I tend to get sidetracked with all sorts of different other things.

Florin is staying in Vancouver and he will continue to bake all his amazing breads as well.

However, for today's post, and awesome results, neither of us can claim any credit. The baker in today's story is Henning, my dad. Baking his own bread at home has always been a point of pride for him. His parents did all the bread baking for the entire family themselves, as well. Years back, when we moved into our new home, he built a little wood-burning oven for himself, just for private use. Ever since, he is baking all our bread in it, and he seems to have lots of fun doing it. Whenever he fires it up for baking, we have a little pizza party beforehand.

Even though my mum and dad have always baked all our bread themselves, I had to go all the way to Canada and meet Florin to really get into baking. Now I am very eager to try out my dad's oven myself, since I've never baked in a wood-fired oven before. I'll keep you posted about the results!

The recipe we are sharing with you today is for my dad's staple loaf, that he's been making since forever. It is a fairly dark rye sourdough, made of two thirds rye and one third wheat.

For two large and two medium loaves

Starter
(prepared 12 to 24 hours in advance and left at room temperature)

100 gr rye sourdough
1 kg medium coarse rye meal
1.2 kg water

Mix the rye meal and water until everything is well incorporated and the mixture has a pasty consistency.

Final dough

Starter
1 kg whole wheat flour
1 kg whole rye flour
1 kg water
50 gr salt

Add the water to the preferment, then add the whole wheat flour, the rye flour and the salt. Let bulk ferment at room temperature for about 8 hours, then shape the dough into loaves and let them rise in proofing baskets (for as much support as they can get). Let proof in final shape for about 4 hours. Bake the proofed loaves at 480 F (the temperature in the oven will slowly drop over time) for about one and a half hours.

Shared at YeastSpotting.

July 8, 2012

Dinner Rolls


In the olden days, when I still used to be a baker, we saved some dough from our baguette batches to turn it into dinner rolls. The results were always amazing. So much so, that my dinner rolls made it onto the 2011 Vancouver Magazine's "101 Things to Eat in Vancouver". Why the rolls, and not the baguettes themselves? It's still a mystery to me; but I'm not going to turn down some well-deserved praise no matter what shape or form it comes in. :)

You can try these rolls using the formula I gave in an earlier post about baguettes, or you can turn this into a strictly white flour affair, just like I did. I don't get to play with strictly white flour too often, so once in a while it can be quite fun. You will be surprised at how much flavour is "trapped" in good, old white flour.

Dinner rolls (for 10-12 rolls):

Levain
(prepared 12 hours in advance and left at room temperature)

80 gr water
80 gr all-purpose flour
1 tsp sourdough culture

Poolish
(prepared 12 hours in advance and left at room temperature)

80 gr water
80 gr all-purpose flour
1 gr yeast

Final Dough

250 gr water
450 gr all-purpose flour
12 gr salt
2 gr yeast
2 gr malt (optional)
Levain
Poolish

Follow the instructions for making baguettes. Bake on a tray at 450 F for about 20 minutes. Enjoy.

Submitted to YeastSpotting.

July 1, 2012

Pistachios and Cranberries


Yes, it's true: these days we are somehow very much into incorporating all sorts of things into our loaves. Even though, in general, we like to think of ourselves as having more of a traditional approach to baking, and despite being the big fans of all these great, established recipes, drawn from a long, deep-rooted baking history, every so often we're all about breaking the rules.

So, in other words, we are always open and eager to try out new things, and to play in our home kitchen with our ingredients and with our dough. And one thing is certain, cheese on top of a slice of fruity and/or nutty bread is (amongst many other things) one of our favourites.

This time around we chose some pistachios and cranberries, and incorporated them into a mostly white sourdough loaf. To make it not strictly 100% white, we made a soaker with some whole kamut flour, and added that to the dough. The loaves turned out to be quite dense (a little denser than we wanted them to be); but the flavour was all there, and we are still enjoying, as we speak, what is left over from the second loaf.

We will share this post also on Susan's weekly YeastSpotting page. 
 
Recipe

Starter 
(prepared 12 hours in advance and left at room temperature)
 
150 gr all-purpose flour
130 gr water
1 tsp ripe white sourdough culture

Soaker
(prepared 12 hours in advance and left at room temperature)
 
200 gr whole kamut flour
200 gr water

Final dough

700 gr all-purpose flour
320 gr water
Starter
Soaker
27 gr salt
150 gr pistachios
150 gr dried cranberries

Mix flour, starter, soaker and water, making sure to hydrate the flour well. Allow about 30 minutes for the autolyse, then add the salt and knead the dough until it is developed. After that, incorporate the pistachios and cranberries. Let the dough ferment at room temperature for about 3 hours and give it a stretch-and-fold after 30 minutes, repeat twice more at 30 minute intervals. After 3 hours of fermentation at room temperature, do a final stretch-and-fold; give it a round shape and put it in a lightly oiled bowl. Cover tightly and place in the refrigerator between 12 and 24 hours.

Take the dough out of the refrigerator, divide the bulk in half, degas the dough very gently and pre-shape as rounds. Allow them to rest for about 1 hour, then shape the rounds into bâtards or boules. Let the shaped loaves proof for about 45 minutes. Bake at 450 F for about 40 minutes, or until ready.

Oh, and Happy Canada Day!

June 26, 2012

Buntzen Lake and "Wurzelbrot"


The past weekend we finally got a chance to hike in an area we wanted to explore all spring and early summer long: The Buntzen Lake Reservoir. We started off on the Buntzen Lake Trail and continued on the Diez Vistas Trail, which offers amazing viewpoints that overlook Indian Arm and pretty much all of Vancouver. While the Buntzen Lake Trail leads you through the forest close to the water's edge and is more of a walk than a hike, the Diez Vistas is meant for more adventurous hikers and starts at the northern tip of Buntzen Lake. It was a nice day's outing, a perfect destination for a Sunday hike, and we finally got a chance this year to enjoy Vancouver's awesome surroundings.

Inspired by all the amazing trees and their incredibly beautiful networks of roots, we decided to bake a loaf originally known in German as "Wurzelbrot". It's a twisted, typical Swiss bread, that reminds one of roots (Wurzeln). Looking for a formula, we decided that we liked Bernd's the best, and gave it a shot. Unlike most other recipes for this kind of bread, the leavening agent is a sourdough culture as opposed to commercial yeast. We used our white culture, and added some whole wheat to the final dough, to give it a rustic touch. For flouring the work surface we used whole rye flour, which gave the crust a really nice rustic look and made it extra crunchy. 

Recipe for two loaves of "Wurzelbrot"

290 gr all-purpose flour (74%)
100 gr whole wheat flour (26%)
200 gr white sourdough culture at 100% hydration (51%)
250 gr water (64%)
9 gr salt (2.5%)

Mix to incorporate all the ingredients, except for the salt, and let it rest for 30 minutes for the autolyse. Now add the salt and knead to fully develop the dough. Bulk ferment for two hours, doing a stretch and fold every 30 minutes (four times). Then let it ferment for one more hour. Sprinkle some whole rye flour on a clean and dry work surface, divide the dough in half, and stretch gently lengthwise. Sprinkle more whole rye flour on top of them, then cover and let the pre-shaped loaves proof for about 45 minutes to an hour (Make sure there is enough rye flour, so that they won't stick to the work surface). After the final proof twist the loaves gently about three times, bake them right away for approximately 25 minutes on a hot stone in a pre-heated oven at 500 F. Steam the loaves right after you put them in the oven using your favourite steaming method.

We will submit this post to YeastSpotting.

June 19, 2012

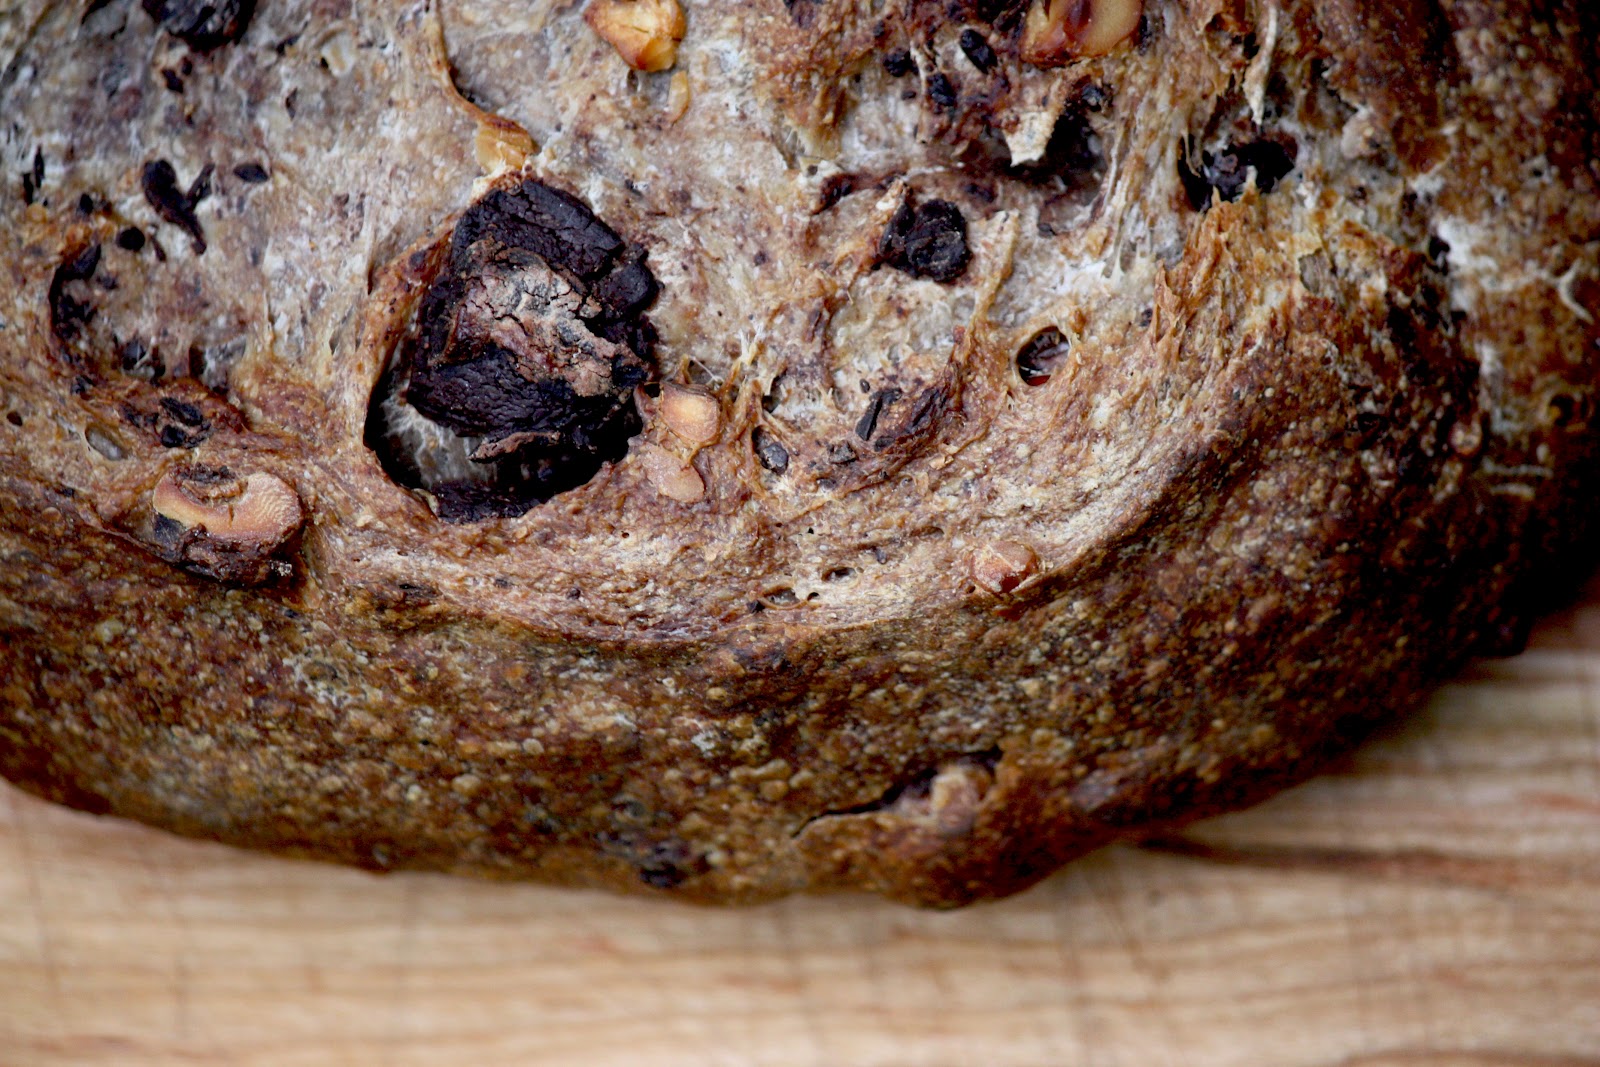
Chocolate and Walnut Sourdough

Mmmmm... Dark Chocolate (72%) and Walnuts incorporated in delicious sourdough dough. To be quite honest, both the idea and the formula are borrowed. We read about this yummy deliciousness on The Fresh Loaf (Thank you so much Ryan for your awesome post.). We read that post a while back and ever since it stayed with us and we were looking forward to the day we get to try it out. That day was yesterday. To be more accurate, the preparations started already three days ago, since the dough had been retarded in bulk in our fridge for more than 21 hours!

There's one favour we ask of you: use high quality chocolate. It makes all the difference.

For two small loaves

450 gr all-purpose flour
25 gr whole wheat flour
25 gr rye flour
150 gr sourdough starter at 100 % hydration (we used our rye culture)
360 gr water
12 gr salt
125 gr coarsely chopped walnuts
100 gr coarsely chopped dark chocolate

Mix the flour, the starter and water, making sure to hydrate the flour well. Allow about 30 minutes for the autolyse, then add the salt and knead the dough until it is developed. After that, incorporate the chopped walnuts and chocolate. Let the dough ferment at room temperature for about 3 hours and give it a stretch-and-fold after 30 minutes, repeat twice more at 30 minute intervals. After 3 hours of fermentation at room temperature, do a final stretch-and-fold; give it a round shape and put it in a lightly oiled bowl. Cover tightly and place in the refrigerator between 12 and 24 hours.

Take the dough out of the refrigerator, divide the bulk in half, degas the dough very gently and pre-shape as rounds. Allow them to rest for about 1 hour, then shape the rounds into bâtards or boules. Let the shaped loaves proof for about 45 minutes. Bake at 450 F for about 40 minutes, or until ready.

This post is also shared at YeastSpotting.