December 21, 2012

Panettone


After trying my hand at baking Stollen earlier this season, I found myself hooked on baking traditional holiday breads, and 'Tis, the Season justifies pretty much anything...

Second Set: Panettone. The baking of this sweet Italian bread is extra thrilling and exciting, because the original recipe calls for a natural starter (or wild yeast). It is quite the process, producing the loaves, and it requires time; lots of it. You'll pretty much have to dedicate two whole days to this, but it's definitely worth it. As is usually the case with baking, you will have plenty of time to go about your daily business, and only once in a while you will need to take short breaks and come back to play with your beautiful dough.

The recipe I followed I got off of the Wild Yeast blog; and I am very grateful to Susan for sharing this superb formula and the detailed steps involved in the process. I made quite a few people happy by sharing some of my special bread. So, thank you, Susan! I found her post very helpful, and the pictures she took of her loaves and her crumb made me even more eager to attempt it myself. I had been trying for a while now to find a recipe that incorporated a sourdough starter, but found that probably as many as 90 percent of the recipes out there are using commercial yeast exclusively.

I would have loved my Panettones to have risen about an extra inch or so, and at first, when I took them out of the hot oven, I was almost a little bit disappointed with their oven spring. And to make matters worse, I managed to drop one while I was hanging them upside down to let them cool overnight. But the delicate and heavenly smell made it all better... Well, and all was forgiven and forgotten the next morning, when I cut into one of the loaves: The structure of the crumb was very beautiful, they smelled incredible and where melting in my mouth. The three loaves of Panettone I got out of this bake were probably the most rewarding thing I have ever baked so far. 

I wouldn't be able to describe the process better than Susan already did in her post, so I won't give you the formula, but rather will include the link to her page, as well as to her more recent (revised) Panettone notes. These were published just after I had baked my very first batch, last weekend, but since I am planning on baking a second batch this coming weekend (just in time for Christmas), I am very excited to improve my results by following Susan's notes.

Oh, and by the way, while I am writing this post, I'm sitting in my kitchen candying some fresh orange and lemon peel, that will go straight into my Panettone. Mmmmm... I'm already looking forward to next year's Christmas.

Submitted to YeastSpotting.

December 2, 2012

In Preparation for Christmas


We just had the first serious snowfall of the season; it came down last night. Add that to all the Christmas preparations I was making during the past days, and it really felt like the first day of Advent today.

On my day off, Friday, I finally managed to bake the stollen I was so looking forward to for the past few weeks. The marzipan having been already made beforehand, was sitting in the fridge, just waiting to be used. I had found a recipe for candied orange peel on a dear friends amazing blog (in German only). Just knowing that I would have to work with the marzipan and the candied orange peel made baking the Christmassy loaf so much more exciting!

Stollen is a traditional German fruit cake or holiday bread made with lots and lots of dried and candied fruit, almonds and spices, often containing marzipan, and covered with a thick layer of icing sugar, reminding one of a snow covered landscape. It is a bread only eaten during the Christmas season, but baked a few weeks ahead of time, so that it can properly age, stored in a cool, dark place. This is probably one of the main aspects of the stollen tradition. Strictly speaking, I might be already a little late baking it, but, to my mind, two to three weeks are still plenty of time for it to age and to develop all its unique flavours.

In my baking I am a big fan of long and slow fermentation. That is why I decided to use a poolish when baking my stollen (prepared 12 to 16 hours ahead), instead of the more traditional yeast sponge, which only gets to ferment for a couple of hours. For the rest of the recipe I did some research, and ended up developing my own, combining information from a few different sources. The dough turned out super nice, pretty soft and sticky with all that butter and marzipan in it. When I was ready to shape it, I managed to achieve a beautiful stollen loaf, but I was pretty sure that it wouldn't hold its shape during the bake. And sadly, I was right. In my opinion it turned out somewhat too flat; but anyway, it's still very, very beautiful!

While the dough was proofing and later, as the loaf was baking, I had enough time on my hands to clean up the mess in my kitchen, make an Advent wreath from some fir branches I had bought at the market, and to fold a few paper snow flakes. And today, after taking a two-day break from the whole stollen business, I had tons of fun covering my stollen with plenty of icing sugar and giving it a similar look to the lanscape outside my window after a snowy winter's night.

Usually you are not allowed to cut into the stollen as early as I did, since it really needs to be allowed to age for a few weeks, as I already mentioned above. Well, I made an exception because I am sending half of it overseas, to Florin, one of the biggest stollen fans in Canada!

For one large Christmas Stollen

Poolish (allow to ferment at room temperature for about 12 to 16 hours )

125 gr bread flour
125 gr water
1 gr yeast

Final dough

275 gr bread flour
125 gr milk
5 gr yeast
1 tbs honey
poolish
150 gr marzipan paste, grated
200 gr butter
1 organic lemon
1/2 vanilla bean
5 gr salt

Nuts and fruit mixture 

500 gr raisins/currants mixture, soaked over night in either rum or apple juice
55 gr almond slices, soaked for about 10 min in hot water
110 gr candied lemon and orange peel

Option for the filling

extra 100 gr marzipan paste

For the finish

250 gr butter, melted
refined sugar
icing sugar

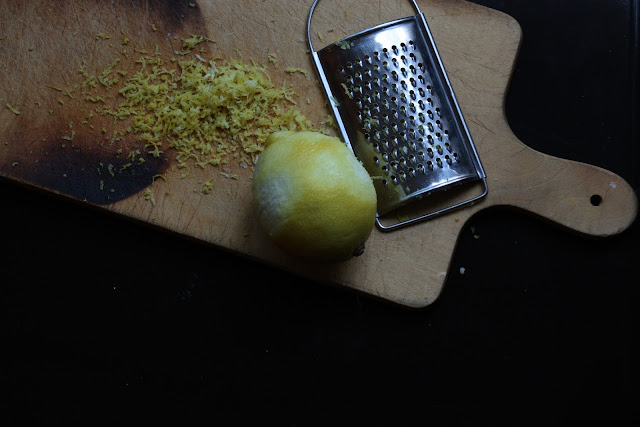
Put all your flour in a large mixing bowl and form a little well in the middle. Add the yeast into the well, then add the lukewarm milk and the honey. Stir in some of the flour, put the mixing bowl aside, cover with a tea towel and let it sit for about half an hour. Now add the poolish, the grated marzipan paste, 200 gr from the soft butter, the grated zest from one organic lemon and the vanilla. Mix all your ingredients until well incorporated, then do a 30 minutes autolyse. Now add the salt and do the kneading until the dough is properly developed. Don't despair, it will be pretty wet and sticky, and all the fat will make it even harder on you. After the dough is developed, gently incorporate the nuts and fruit mixture (carefully drained to avoid adding too much extra liquid to the dough). If you don't like working with extra wet dough, go ahead and add a little extra flour. Give the dough about two hours to proof until it almost doubles in size. Shape the stollen on a lightly floured work surface and in the process add another 100 grams of marzipan paste shaped into a strip, down the middle of your stollen loaf. Preheat the oven to 390 F, bake at that temperature for the first 15  minutes, then drop it to 350 F and bake it for another hour. To avoid it turning too dark, cover with aluminium foil for the final 30 minutes.

After taking the stollen out of the hot oven, brush it immediately with about 250 grams of melted butter, then toss with plenty of refined sugar. Let the loaf cool down over night properly before dusting it with a thick layer of icing sugar. Wrap in aluminum foil and store it in a cool, dark place for at least two weeks before cutting into it.

For YeastSpotting!